
Build by 29gb
Worldedit is a tool that allows you to create and modify builds. You can use it to generate shapes, patterns, and terrain. It’s a quick, easy and convenient tool for building or terraforming. This article will go over the more advanced commands for WorldEdit. Referencing the WorldEdit for Beginners article will allow you to understand the basics and common commands included in this article.
¶ Navigation
The following are WorldEdit commands that help your selection move around when building. The first two commands move you, while the others move and change the way your selection faces.
//unstuck- This command will get you out of a block if you manage to get stuck within one. When you run this command, it puts you on the block that is in the top-most free position. If you do this while not being stuck in a block, it will not do anything.
//up [distance]- This command will move you upwards of a specified amount of blocks, which is your distance argument. It will place you on a glass block.
//flip [direction]- This command flips the current clipboard selection in the direction you add as the argument. You can use North, South, East, West, Up, and Down.
//rotate [y] [x] [z]- This command allows you to rotate your selection. You will need to//copyyour selection before rotating it. When using this command, use 0 for the axis that you do not want it to rotate on.
¶ Clipboard Commands
Worldedit uses the cut, copy, and paste commands with the clipboard. //cut command removes the selected data from its original position, while //copy creates a duplicate; in both cases the selected data is kept in temporary storage (the clipboard). The data from the clipboard is later inserted wherever //paste command is done.
//copy- Used to create a duplicate of a selected area in the clipboard. The player's position relative to the blocks is also stored, meaning where you stand when you enter//copyis important. For example, if you stand at the front door of a house when using//copyyou will be standing at the front door when you paste the selection.
//place- Allows you to place a selection stored in your clipboard. As explained above, the clipboard contains not only the blocks copied but your position relative to those blocks. Both are used when pasting the clipboard.
//paste- Available to those with a donator rank or a Creative grade. It fulfills the same purpose as//placeand allows pasting without airblocks (//paste -a). In general, it is recommended to use//place -aor//paste -ato paste everything but airblocks.
//rotate <90/180/270>- Rotates your clipboard a specified number of degress in a clockwise direction. If you use//rotate 90on the clipboard, it will turn the selection 90° clockwise. If you were looking north and did//rotate 90, the building would then place/paste in the eastern direction.//rotatewill not perform any noticable change until you do//placeor//paste. Using angles other than 90°, 180°or 270° will result in missing blocks and a distorted build.
¶ Region Operations
This section covers WorldEdit commands that alter what was built or add in new blocks with specific arguments. These commands are not typically used to construct the majority of builds.
//move [amount] [direction] [fill pattern]- Realize you built something in the wrong spot? This command will shift the entire selected area. You can choose to not add a [Fill Pattern] which will fill the area left behind with air.
//stack- This is a very useful command for building towers if you want to create multiple floors of the same design or walls with a repeating pattern. First select a region that you will want repeated and type//stack [amount] [direction]. The direction you input will determine where the walls/floors will stack. Alternatively you could look in the direction of where you want to//stackand run//stack [amount]to perform this without specifying a direction.
//flora- Places tall grass and flowers over grass blocks. When used on sand, it will place cacti and dead grass. This command works similar to overlay. It places it in a random pattern.
//hollow [thickness] [fill pattern]- This command will hollow out objects in your selected area. The thickness you provide in the command is how thick the shape left behind will be. You can choose not to add a [Fill Pattern] and doing this will fill the hollow object with air.
//line [pattern] [thickness]- After making your selections (//pos1and//pos2), running this command will create a line of blocks from pos1 to pos2. You can also add a -h flag to make it generate hollow.
//center [pattern]- Sets the center block from your selection.
¶ Generation
These commands are often used to create small or large builds. There are commands for many shapes that come in all sizes. Keep in mind that these are commands that will make general shapes. If you wanted to create a hollow shape, add the letter h in front of the shape. For example, if you wanted to create a hollow cylinder, you would run //hcyl.
//cyl [pattern] [radius] [height]- When you run this command, a cylinder is created at your feet and goes upward. If you want a circle or a circle outline, you only need a cylinder with a height of 1.
//sphere [pattern] [radius]- Spheres will also generate its center one block above the one you are standing on. You can create ellipsoids by specifying multiple radii. When doing so, the order is north-south axis (X), up-down axis (Y), and then east-west axis (Z).
//pyramid [pattern] [height]- This will create a pyramid with a certain height. When you specify the height, it will create layers. If you used 5 as the placeholder for height, you would generate a 5-layer pyramid.
//faces [pattern] [radius]- This command will make a hollow cube out of the block you use for the pattern argument. You will need to make a selection beforehand either using the//wandor//pos1and//pos2.
/forestgen [size] [type] [density]- This command will generate a forest! The size parameter indicates the width and height of the forest. Regarding density, you can use 0 - 100 however, the default is 5. Please be careful when using this command as it can be difficult to//undothe generation of these trees.
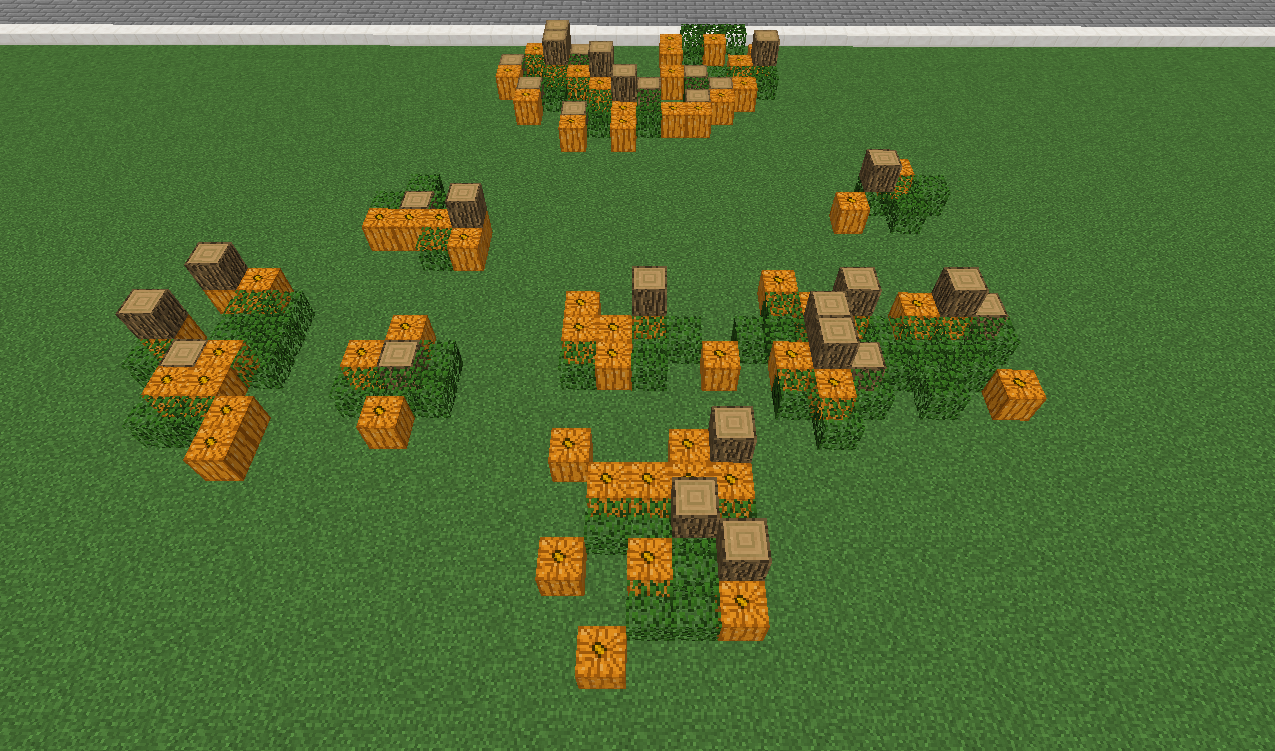
/pumpkins [size]- This command will generate in a pumpkin patch. It is a mix of blocks and will generate in a square shape radiating out from your feet. However, the density of this is not adjustable.
¶ Generating Arbitrary Shapes
Similar to the section above, these commands are generated in shapes that can be used when making builds. However, due to the nature of these shapes they appear more correct when generated on a larger scale. These are some of the more difficult commands to utilize as it requires a mathematical formula.
//generate [pattern] [expression]- This command generates any shape that can be expressed in a mathematical formula. This includes some complicated equations that will require outside research. Shapes include a torus, rotated cylinder, jagged canyons, etc.
¶ Other Commands
/snow [radius]- This command simulates snowfall in Minecraft in a radius.
/thaw [radius]- This command simulates snow melting in Minecraft in a radius.
/ex [radius]- Will extinguish fires in a radius.
¶ Masks
Masks determine the blocks that will be affected by commands, brushes, and more. To apply a mask, you will need to make a selection using the //wand or //pos1 and //pos2. You can use masks on brushes, as a parameter, or to all your WorldEdit, Voxelsniper, and GoBrush actions globally (gmask).
NOTE: While the following masks are explained with
//mask, you may use them with//gmaskas well.
¶ Basic Mask
//gmask [pattern]- Applies a mask to all WorldEdit, Voxelsniper, and GoBrush commands
//mask [pattern]- Applies a mask to a specific brush
You can stack masks as well, using your global and a brush mask at the same time. You can clear your global mask by using //gmask again without any arguments.
Example: //mask iron_block or //mask iron_block,diamond_block
¶ Vicinity Mask
//mask ~[pattern]- This masks to blocks that are touching a certain block or pattern
Example: //mask ~iron_block or //mask ~iron_block,diamond_block
¶ Above Mask
//mask >[pattern]- This masks to blocks that are above a certain block or pattern
Example: //mask >iron_block or //mask >iron_block,diamond_block
¶ Below Mask
//mask <[pattern]- This masks to blocks that are below a certain block or pattern
Example: //mask <iron_block or //mask <iron_block,diamond_block
¶ Angle Mask
//mask /[ANGLEMINIMUMd][ANGLEMAXIMUMd]- This masks to blocks within a certain range of angles.
Example: //mask /[0d][50d]
¶ Examples
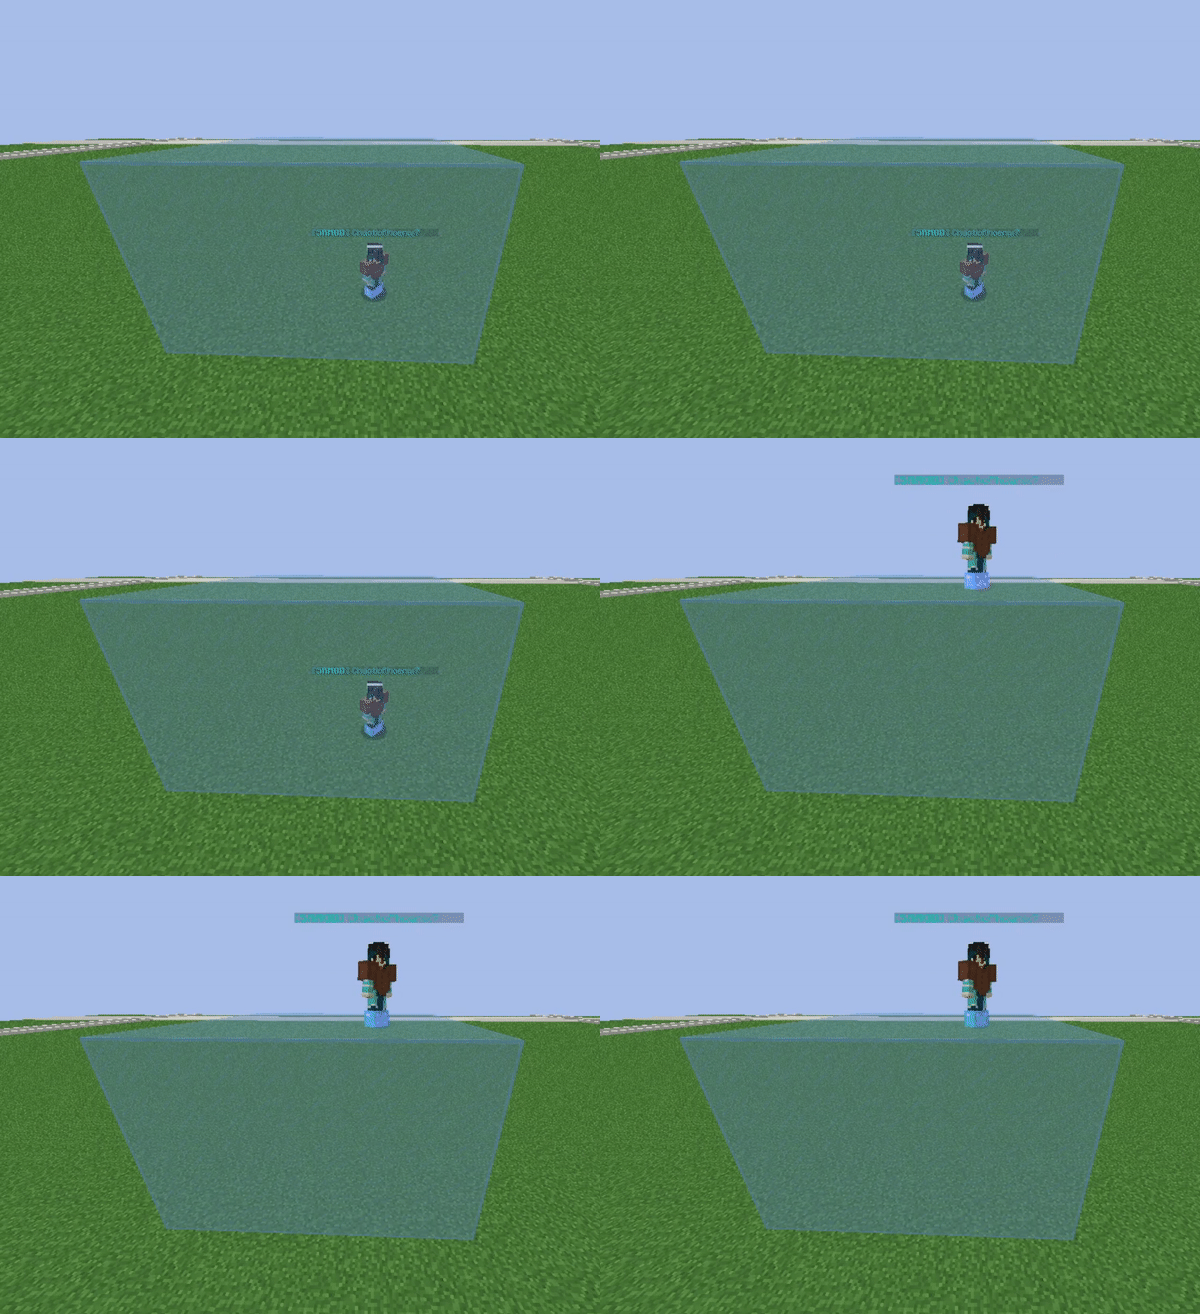

//rotate 0 0 90 - This will rotate your selection on the Z axis.
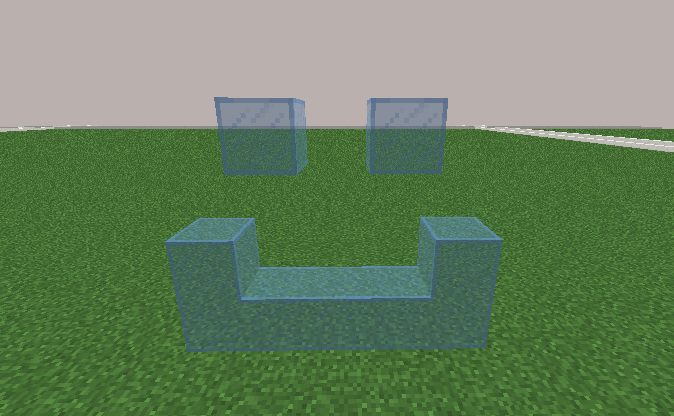
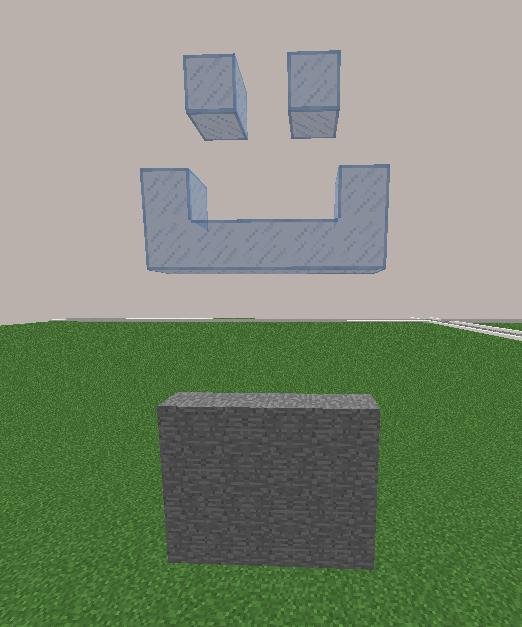
//move 7 up stone - This will move the selection 7 blocks up, leaving stone behind line

//line glass

//hcyl stone 10,1 - Stone circular outline with a radius of 10.
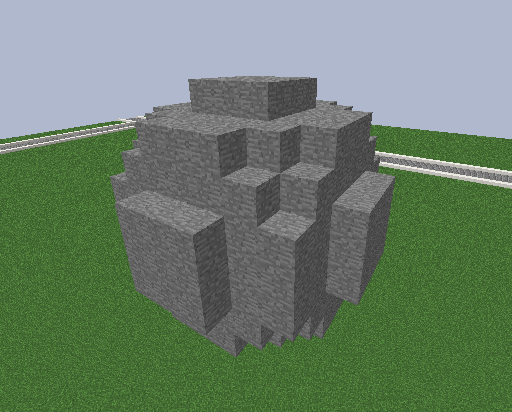
//hsphere stone 4,4,4 - A hollow, stone sphere with a radius of 4.
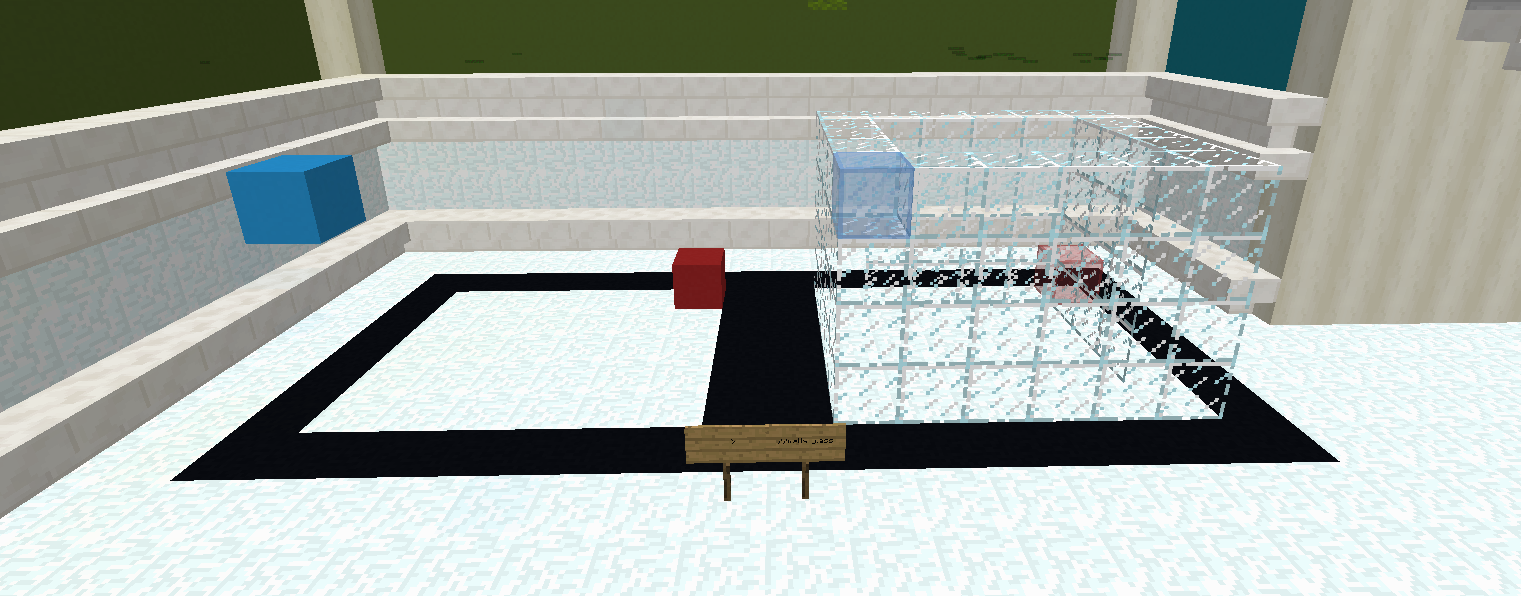
//faces glass - This will generate in a hollow cube made of glass blocks
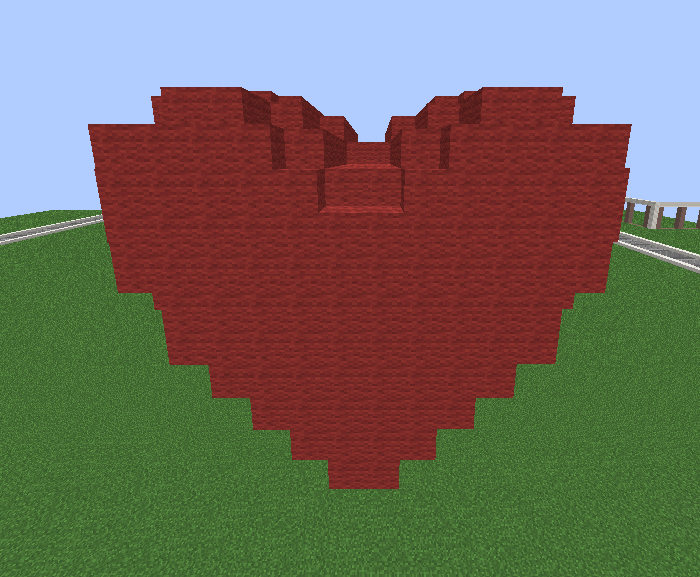
//g red_wool (z/2)2+x2+(5*y/4-sqrt(abs(x)))^2<0.6 - Generates a heart made of red wool.
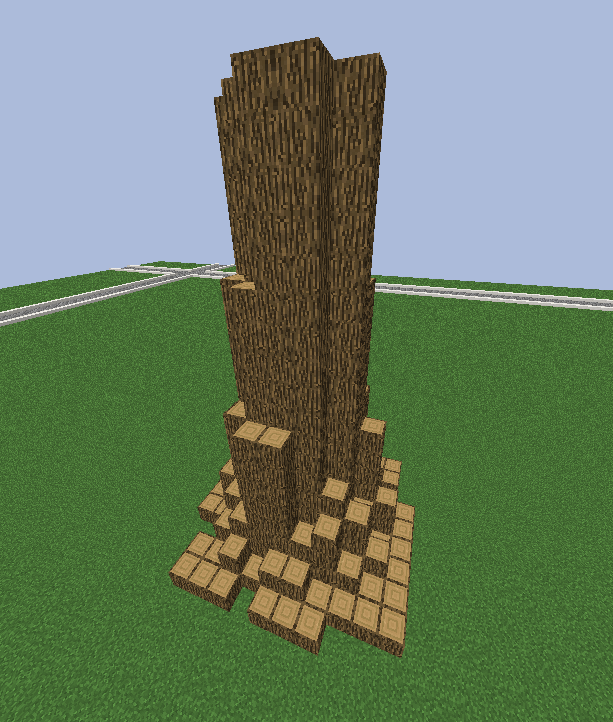
//g -h oak_log (0.5+sin(atan2(x,z)8)0.2)(sqrt(xx+z*z)/0.5)^(-2)-1.2 < y - Generates in a hollow tree stump